
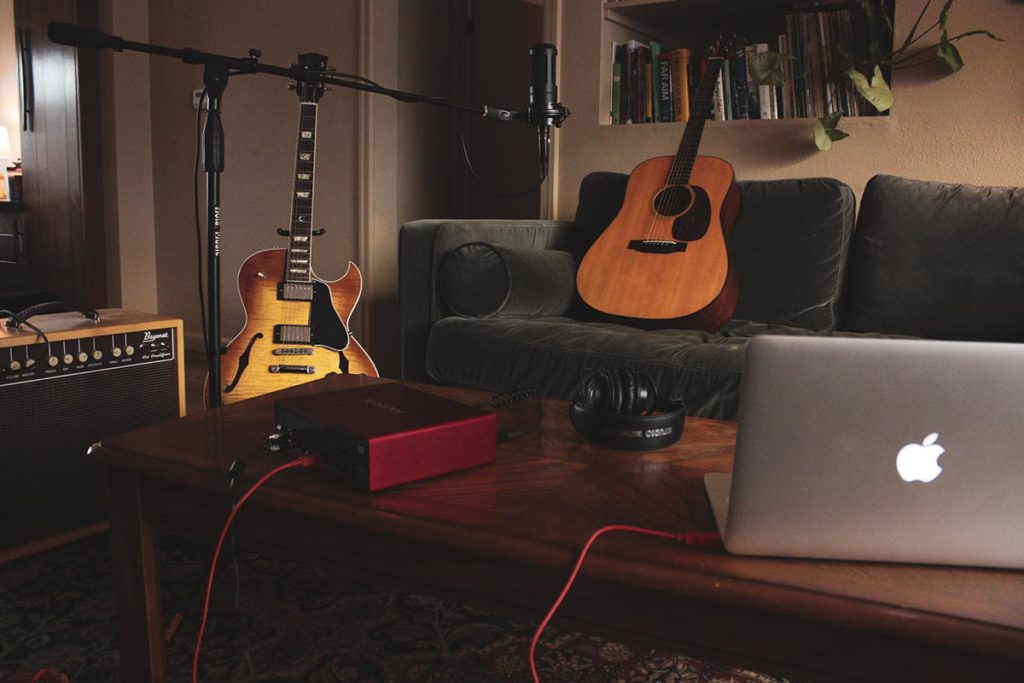
I’m sitting here on my couch looking at recording gear and starting thinking, what is the best recording setup for a living room or small apartment?
These days there are unlimited options for recording setups from interfaces and headphones, to microphones and cables. I did a ton of research when finalizing my simple recording setup and have settled on the gear listed below. This fills my need for a recording setup that is perfect for any player who will be recording in their living room or apartment. Let’s dive into the gear in this setup, why I chose them, and what you need to know to get started.
- Interface: Focusrite Scarlett 18i8
- Microphone: Audio-Technica AT2035 Condenser mic package (cable and shock mount included)
- Mic Stand: Hola! Music HPS-101TB Professional Tripod Mic Stand
- Headphones: Sony Professional MDR-7506
- Software: Pro Tools First (included with Scarlett interface)
This recording setup works great for capturing my acoustic instruments, voice, and electric instruments, and would also work great for capturing just voice for podcasts or film voiceover work.
Keeping this all under $625
First, I want to address how I went about setting a budget for this recording setup. Now I’m an enthusiast, and I know that I don’t need the most expensive studio quality gear, so I’m not looking to break $1000.
At the same time, I know from years of using and playing many different types of gear that you have to stay away from the low end stuff. You’ll end up paying more in the end to replace the garbage gear that originally saved some money buying. It’s never worth it to buy cheap gear.
This leaves us in the middle ground of the price range, which for a whole single microphone recording setup keeps things under $625. This is a killer setup that will last for years and be able to provide the professional level quality and ease of use that the savvy guitar player (or any musician, really) requires.
There are a couple places where you can save some money, and these will be discussed in the sections for each piece of gear. What I will not do is recommend a piece of gear that sacrifices quality for price. Everything in this article is tested and highly recommended from myself.
What Do I Need For a Simple Recording Setup?
Computer
First of all, I’m assuming that you already have a computer to manage the recording software. More on the specifics of what this needs to be below, but as long as it has a USB and isn’t 10 years old you should be alright.
Microphone
Next is a Microphone. Yes, your computer probably has a microphone built into it, but that is useless for recording anything other than a flat voice. There are two main types of microphones that you hear about. Passive Dynamic microphones, and Condenser mics.
So what’s the difference, and what type of mic are we going to be looking at for our setup? Dynamic mics are used in a ton of situations, are a mainstay of any live application, and resist feedback well (which is partly why they’re so good for live sound).
Condenser mics are typically much more sensitive than dynamic microphones. Which makes them perfect for recording in a place where you can more or less control the ambient noise. Sounds a lot like your living room or apartment! They are great for picking up the nuances and subtleties of acoustic guitars and vocals, and work well for miking amps at lower volumes. For our setup we’re going to use a condenser for our first microphone. Dynamic mics will make great purchases later when you need them, but for now one nice condenser will do the trick.
Interface
Next, we need to get the sound from the microphone into the computer. This is a little bit trickier than just plugging a microphone into a computer and calling it good. There is a process that has to occur in order to get the sound from an analog signal to a digital one. This conversion is handled by what’s called an A/D converter. A/D = Analog to Digital. USB microphones that plug directly into a computer have this converter already built into them.
We on the other hand, are going to use what’s called an audio interface. This interface allows us to plug microphones into it, adjust levels, plug headphones to hear what is coming in through the microphones (monitor), and then plug this all into a computer via USB to record.
To complicate matters, certain microphones require something called phantom power. These microphones are very sensitive and need extra voltage to work. Can you guess what types of microphones these are? Condensers! Of course!
Therefore, we need to make sure that the interface we’re choosing has phantom power, which is not too hard as most of them do these days. There are many many options, so I’m going to make this simple and recommend the best that I’ve found in this price range and based on hours and hours of research.
Mic Stand
This is a pretty simple one. We can’t hold the mic and play guitar at the same time now can we? However, all mic stands are not created equal. Having used quite a few, you’ll want a heavy duty tripod stand. This will allow you to position the mic in any way you need: in front of an acoustic guitar, in front of a guitar amp, or standing for some vocals.
Also you’ll want something that is heavy duty and will not tip over when the mic arm is extended. I have used many stands, and the one recommended below is a great quality stand for an awesome price.
There are different types of mic stands out there that are used specifically for certain tasks, like miking amps or drums, but this one will handle nearly every scenario you can throw at it.
Headphones
There are two main types of headphones to consider for recording. Open back and closed back. What’s the difference? Closed back headphones isolate the user from sounds outside of the headphones.
This means three things.
- They work well for recording because you are well isolated from noise you don’t want to hear.
- What you do hear is controlled by you through the monitor output
- The headphones need to be of good quality as you’re relying on them solely to reproduce the live and recorded tracks.
Open back headphones are often used when mixing and mastering when external noise is not an issue. In a perfect world, you’d use closed back headphones for recording, and open back headphones for editing and mastering.
But we want something that will fill both roles for now and work just fine. The headphones I selected are a workhorse that I’ve been using for many years.
Software
The software that we need to use is called a DAW or Digital Audio Workstation. This is a program that is used to record, mix, edit, and process digital audio that comes in from our audio interface. There are many types of DAW’s out there, and picking one (let alone using it) can be a daunting task.
I’m a fan of easing into complicated software. Thankfully, most interfaces will come with some type of recording software typically in the form of a stripped down version of the enterprise level application. These are perfect for learning the software, and honestly doing most of the recording you’ll ever need to do.
If you find that you’re running into a lack of features then you can upgrade, but until then just use the free stuff that comes with the interface. In the case of the Scarlett, we get Pro Tools First which is an incredibly robust DAW that has served almost every one of my needs so far.
Is That All I Need?
Yes! With just these 6 things you’ll be able to start recording in minutes. Now, I have left out a less exciting but important piece, which are the cables necessary to hook everything up. The only audio cable we really need is a female to male XLR cable which connects the microphone to the interface. If you’re plugging an electric guitar into the interface directly, you can just run your ¼” instrument cable straight into it. This isn’t necessarily recommended for the best sound quality, but it is possible.
The reason I didn’t call out the cable specifically is because the microphone package I selected contains one.
Let’s Get Into The Gear
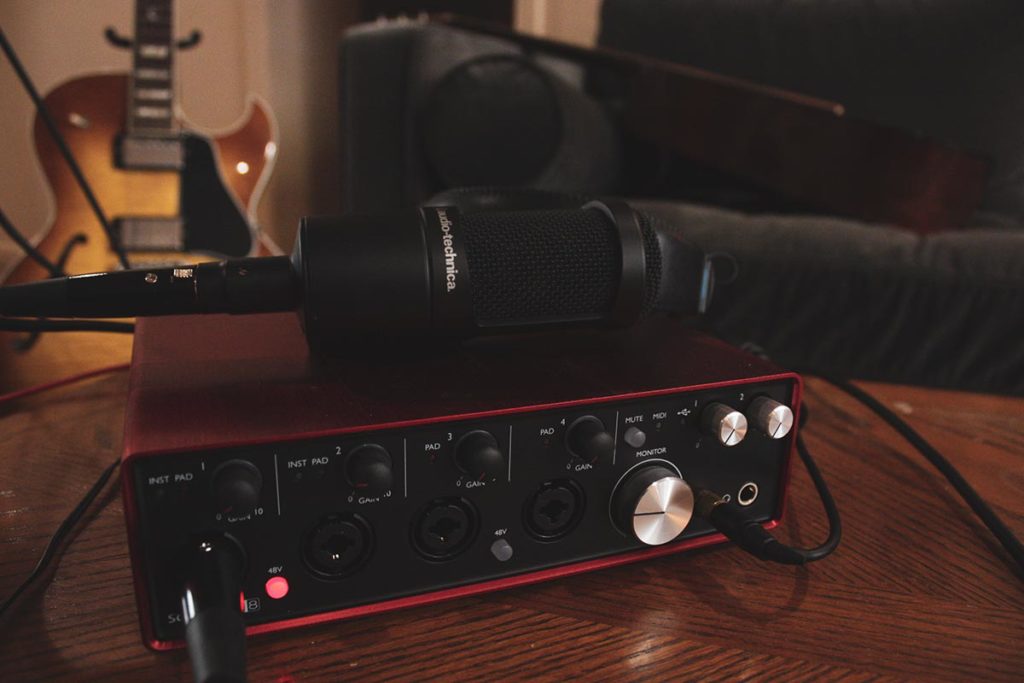
FocusRite Scarlett 18i8
Again, after many hours of research, watching YouTube comparisons, and weighing my options, I went with the FocusRite Scarlett 18i8. This is a great interface with 4 discreet preamps that can provide phantom power on 4 or its 8 channels.
Most of the recording I do requires 4 or less channels, which makes this the perfect interface for me, and nearly all recording that will be done in a small apartment. This setup contains just one microphone which works well for miking an acoustic guitar, an amp, or an acoustic guitar and singer. Once you’re ready to expand your setup you can get another mic which opens up the possibilities of miking an amp and vocals, guitar and vocals with more options, etc.
Another common use of inputs would be a combination of mics and direct instruments. You can plug in an acoustic guitar with a pickup into one channel, a mic aimed at the acoustic guitar, and blend these two to get more depth of tone and highlight the pros of both the internal guitar pickup and an external microphone.
Add a vocal mic to the setup above and now we’re at 3 inputs. You can see that having 4 inputs allows for a lot of flexibility. This is why I went for the 4 input Scarlett and not the 2 input version. If you know for an absolute fact that you won’t be using more than 2 inputs, then by all means, go for the smaller one and save a little bit of money. But honestly, I recommend having the interface that won’t hold you back should you need it.
Another great feature of the 18i8 is the ability to expand inputs. If you find yourself needing to mic a band or drum kit, you can either do that through the unbalanced line inputs on the back, or expanding with FocusRite’s OctoPre which connects to the 18i8 interface and gives an additional 8 balanced inputs.
The interface itself is intuitive and very easy to use. Just plug the microphone in, plug the headphones in and now you can monitor what the mic picks up. Plug it into the computer and you’re all set to record. See how simple that is!?
The Scarlett 18i8 has phantom power which will be necessary to drive any condenser mics you use.
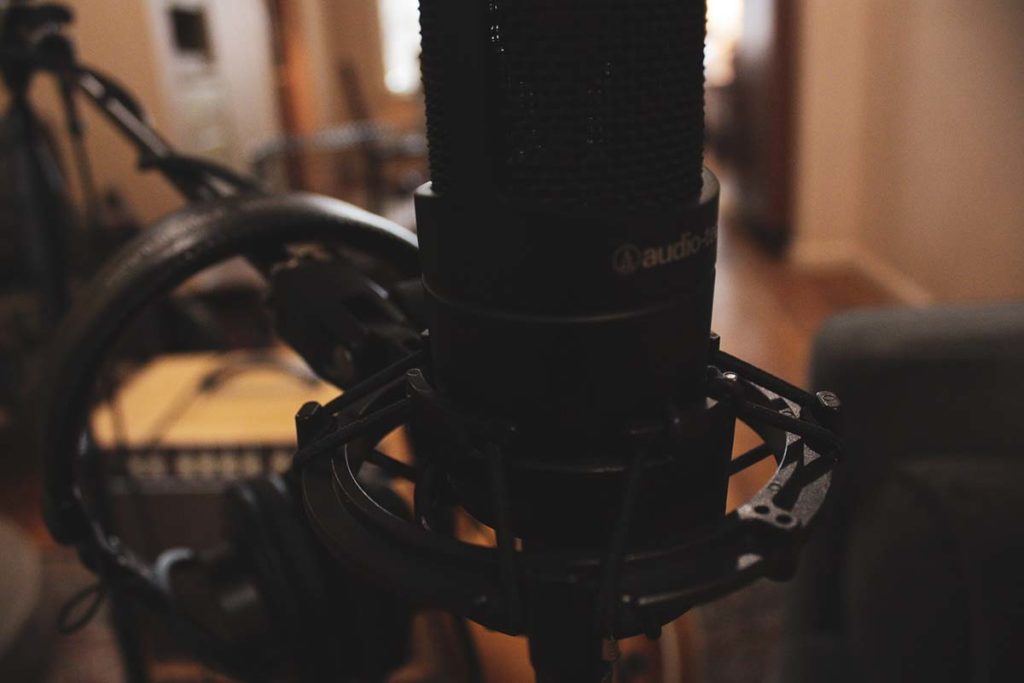
Audio-Technica AT2035
There are hundreds of options to choose from when buying a microphone. And I researched nearly all of them before settling on this one.
As I already mentioned, we’re going with a condenser mic for its sensitivity, and incredible ability to capture vocals as well as other instruments.
The AT2035 is a great mic that is in the mid-range of Audio Technica’s offering. The first thing you notice when pulling this mic out of the box is its heavy duty construction and feel of quality. It is clear from the start that this is a serious mic for legitimate recording.
One of the great features of this microphone is the ability to pad (attenuate, or lower) the input by 10db. This is great for louder situations that would otherwise overwhelm a sensitive input of a condenser microphone. For instance, if you’re miking an amplifier, you may need this depending on the amp’s volume.
As I mentioned already, condenser microphones need what’s called phantom power. How does a mic get phantom power? It comes from whatever it is plugged into. In this case the 48 volts of phantom power comes from the Scarlett interface, and gets to the mic through the XLR cable that it’s plugged in with.
You’ll notice that the condenser may not look like a normal microphone that you sing into. This style is called “side-address” where you speak, or play into the side of the mic body instead of the end of it. Because of this orientation, the microphone needs a different mount (rather than the usual clip) for the mic stand. The AT2035 comes with a shockmount that will fit any mic stand.
The mic package I recommend also comes with a pop filter which removes the popping noises and sharp hisses that come with P’s, B’s and S noises. And a 10’ XLR cables is included as well. This connects the microphone to the Scarlett interface. A 10’ cord is as short as I’d go, but works well for tight quarters recording. Pick up a 20’ or more if you find yourself coming up short with the 10’. Thankfully these cables are pretty cheap on Amazon.
Hola! Music HPS-101TB Professional Tripod Mic Stand
This stand is the perfect all around mic stand. It handles vocals, amps, etc. and will last a long time. One of the common problems with stands is that below the $60 range they feel very cheap and are too light to reliably hold a microphone. This problem gets worse the farther you have the upper arm extended. With the AT2035 mounted in its shockmount, the Hola! stand holds the microphone fully extended without tipping over. That’s exactly what you want in a mic stand.
Sony Professional MDR-7506
As mentioned above, we’re looking for a quality pair of closed back headphones for our package, and the Sony MDR-7506 delivers just what we need.
Not only are these one of the better sounding pair of headphones I’ve used, but they’re extremely comfortable and durable as well. I’ve had the same pair for close to 5 years and they’ve seen use nearly every day. They are working just as well as the first day I pulled them out of the box.
They come with an ⅛” connection and a ⅛” to ¼” adapter. Make sure you don’t lose this adapter as you’ll need it to plug into the Scarlett interface. The monitor outs are ¼” on the interface.
While some dismiss the build quality as there is little metal found in the outer construction, these headphones have stood the test of time for me, and for $79 you just can’t go wrong. If these broke tomorrow, I’d immediately buy another pair.
ProTools First or Ableton Lite
These are both free when you register your Scarlett interface, so don’t spend time trying to find which DAW to start using.
Essentially, all DAWs do the same thing. At a basic level they all let you use the setup you’ve purchased above to record audio, mix it, and edit it into songs or whatever your final product is. Personally, I’m not an expert when it comes to recording software. I chose to install and use ProTools First because the interface looked familiar to what I’ve used in the past.
It has been a great platform for basic recording and I’d suggest it to anyone starting down this path. Check out some tutorials on YouTube on how to start and you’ll be up and running in no time.
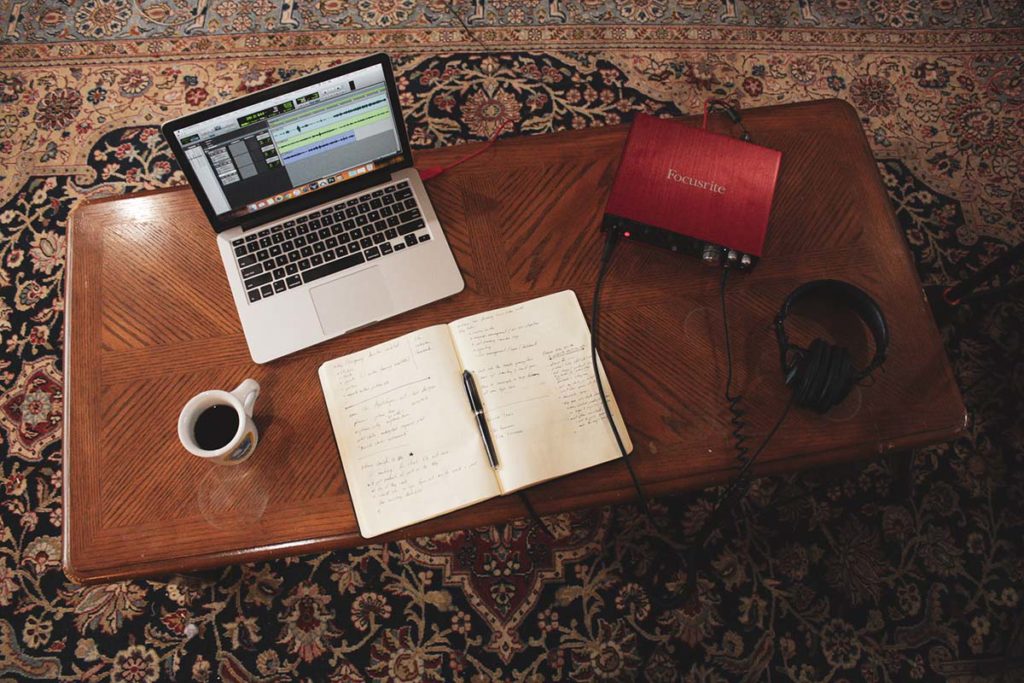
Putting It All Together
All in all, getting this setup up and running is incredibly simple.
- Unbox the interface but don’t plug it into the computer yet.
- Set up the mic stand, screw on the shock mount, and place the microphone in it.
- Connect the mic to the interface with the mic cable
- Plug the headphones into the front headphone monitor connection
- Turn all knobs down to 0 before turning the interface on.
- Power up the interface, and make sure the 48v button is pressed to activate the phantom power to the microphone.
- Slowly turn up the large monitor knob, the headphone (1) knob, and the channel input (where the mic is plugged in).
- You should be hearing the microphone’s output through the headphones.
- Read the directions for installing the necessary drivers and software before plugging the interface into the computer.
Now Get Recording!
Let your creativity out and explore the different musical ideas that you can now record. You can also use this setup for practice [my favorite practice tip], voice recording, or podcasting. Though the world of recording can seem incredibly daunting, using this setup is a great way to dive into it. Don’t get swallowed by the mountains upon mountains of articles about different gear. Start simple, then slowly work your way into bigger and more complicated setups. Plus, if you’re in a tight space, this is the perfect way to go.